
AI Rendering vs V-Ray: Choosing a Concept Workflow
Compare image-based AI concept exploration with a scene-based V-Ray workflow, including revision control, review effort, and total task cost.
In this article
Compare image-based AI concept exploration with a scene-based V-Ray workflow, including revision control, review effort, and total task cost.
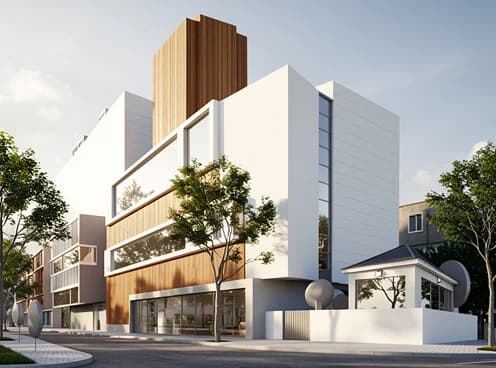
The useful question is not whether AI rendering is universally better than V-Ray. It is which workflow can meet the requirements of your next visualization task, with an acceptable amount of preparation, correction, and review.
This is a workflow comparison based on product documentation and the scope of AI Arch Generator. It is not a timed, same-scene benchmark. We have not measured a cost or speed advantage over V-Ray in this article.
Define Which Workflow You Mean
Here, image-based AI concept exploration means using an exported view or sketch as a reference, describing an intended appearance, and reviewing a generated image. It does not mean importing an editable scene into AI Arch Generator.
Scene-based V-Ray rendering means working with a scene and its rendering controls. Chaos describes V-Ray for SketchUp as a rendering integration for SketchUp; see the official product overview.
Chaos also offers AI tools within V-Ray. Its Veras integration overview lists Veras as included in V-Ray Solo, Premium, and Collection for supported integrations. Veras generation consumes Chaos Credits; included access does not mean unlimited generation. Check your host, installed version, subscription, and available credits before evaluating an additional tool. See the V-Ray for SketchUp and Rhino release overview for current integration details.
Compare Control, Not Just the Final Appearance
| Question | Image-based AI concept workflow | Scene-based rendering workflow |
|---|---|---|
| What is the input? | An image reference and a requested direction | A scene with the relevant geometry and rendering setup |
| Where do design changes live? | The generated image; they must be reconciled with the source design | The editable scene used for rendering |
| How do you explore an appearance? | Adjust the requested direction and review the output | Adjust scene materials, lighting, camera, or other controls |
| What needs verification? | Whether structure, materials, and intent survived generation | Whether the scene and rendering setup accurately represent the intended design |
| What is the cost unit? | The accepted result, including failed attempts and review | The accepted result, including setup, rendering, revisions, and review |
These are workflow distinctions, not quality scores. A renderer's controls do not automatically make an image an accurate specification, just as a realistic AI image does not establish that the underlying design has been preserved.
Start with the Deliverable
For an early appearance study, an image-based route may be worth testing when you already have a suitable view and can accept visual reinterpretation. Define what can change before generating. A new material direction might be acceptable; a missing entrance or an extra floor may not be.
For a scene that is already prepared, compare against the cost of the next V-Ray revision, not the cost of rebuilding the entire project. Existing materials, cameras, and team experience can change the trade-off substantially.
For repeated views or detailed revisions, evaluate consistency across the whole set. An attractive single image is not evidence that another view will preserve the same facade or material boundaries. Include the effort required to reconcile the images with the source model.
For specified finishes or analytical requirements, write down what must be verified and choose a process capable of that verification. Neither a product name nor photorealistic appearance alone is proof that a technical requirement has been met.
Compare Total Task Cost Fairly
For each route, calculate cost per accepted result as the attributable subscription cost, additional usage charges, and recorded labor cost divided by the number of results that meet the same brief. Keep active work separate from unattended waiting, and disclose how you allocate subscriptions and value labor. This article provides a costing method, not measured savings.
Set the same brief and acceptance criteria for both routes. Record the starting assets: a finished scene and a rough sketch are not equivalent starting points.
Track preparation, active editing, waiting, failed attempts, and final review separately. Include any enhancement or manual correction needed to reach the agreed result. Do not compare a commissioned visualization service's entire fee with the price of one AI generation.
Keep subscription allocation separate from additional charges. Existing seats, credits, hardware, and team skills affect the incremental cost of a test. Record the actual plan and date rather than assuming that all products offer unlimited generation or identical commercial terms.
When no output meets the brief, report that outcome instead of dividing cost by a successful-image count that does not exist. A lower per-attempt price is not necessarily a lower cost per accepted result.
Use a record like this for each route. Fill it with your own observations; these are fields to measure, not benchmark results.
| Record | What to include |
|---|---|
| Starting assets and required result | Source view or scene, required views, allowed changes, and rejection criteria |
| Subscription allocation | The share of the actual subscription you attribute to this task, with the allocation method |
| Additional usage | Extra credits, rendering charges, and any paid enhancement used for this task |
| Active work | Preparation, editing, retries, manual correction, and final review time |
| Unattended waiting | Record separately from active labor; explain any deadline impact |
| Accepted results | Count only outputs that meet the same brief; keep rejected attempts in the cost total |
Avoid counting included credits twice: if their cost is already represented in the subscription allocation, do not add that allowance again as an extra purchase. If you compare incremental spending instead of allocated total cost, label it clearly and use that basis for both routes.
A Practical Evaluation Sequence
- Choose an input you are authorized to use and a specific concept decision.
- Record the features that must remain and the changes you will allow.
- Set an attempt limit and budget before testing.
- Keep all attempts, including errors and rejected images.
- Review results against the brief before considering presentation polish.
- Compare the full task effort and decide whether either route is useful for that task.
This procedure may support a decision for your project. It does not establish an industry-wide winner. Small tests should be reported with their inputs and limitations, not turned into universal speed or savings claims.
Can the Workflows Be Combined?
One option is to explore a direction with generated images, translate the selected decisions into the source model, and then create a controlled rendering set. Another is to use AI tools already available in your rendering environment. Neither approach removes the need to inspect changes.
Preserve the source model and a record of which images are exploratory. Do not treat an image edit as an automatic update to geometry, material specifications, or another view.
For the image-export route, see the SketchUp workflow guide. For a concise description of the task AI Arch Generator supports, visit the SketchUp use case. To explore a concept with your own reference image, open the Architecture Generator.
More Posts
More Posts
Architecture Presentation Board: A Complete Guide (Layout, Examples + AI)
A complete guide to designing an architecture presentation board — essential elements, layout and hierarchy, competition vs client boards, and how to speed it up with AI.
Sketch to Render AI: How Architects Turn Hand Drawings into Photorealistic Renders in 2026
A practical guide to AI sketch-to-render for architects, students, and designers. What it does, how it fits real workflows, and where it still falls short.
How to Convert a Hand Sketch to a Photorealistic Render: Step-by-Step (2026)
A practical step-by-step walkthrough for converting hand sketches to photorealistic architectural renders using AI. Settings, prompt patterns, and iteration tactics that actually work.
Get the next product and workflow notes in your inbox
Newsletter
Join the community
Subscribe to our newsletter for the latest news and updates